There comes a time in every homesteader’s schedule, when it’s time to harvest a Hen. Whether a hen is older and no longer laying, or perhaps you have raised hens as a source of meat, there is a time you will need to know how to harvest a chicken! Over the years I have harvested many and this is how we do it at The Cove! I am not going to sugarcoat this article or drag it out with unneeded stories… let’s get down to the nitty-gritty!
![]()
Our essentials needed to do the job…
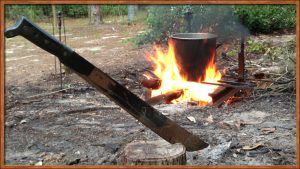
- A sharp machete. I prefer a machete over an axe because it leaves little room to miss.
- A chopping block
- A holding ‘pen’, cage, or box to let the chicken stay overnight and empty its bowels
- A large, industrial 20 gal pot to heat water in
- A small hanging line, like a clothesline or a nail in a tree to hang the bird to bleed out
- A bucket to catch the blood
- A freshwater source for rinsing whatever may need rinsing during the process
- Firewood to heat the de-feathering pot of water
- A cooler with ice or frozen containers of water to cool the chicken down once harvested
![]()
Preparing the birds for harvesting…

- In the evening, the night before harvesting, we pick our hens and move them to a small holding cage or box. They are easily moved when it is dark and they are ready to roost. They are put in the holding box, where food is withheld overnight, and allowing them to have an empty crop the following day.
- On harvesting day, have all your ‘eggs in a row’. Have the water heated to 150-160 degrees, the machete sharp, and the cooler ready. The water should be hot enough to release the feathers but not hot as to semi-cook the chicken.
![]()
Harvesting…

- Remove one hen from the holding box. With one hand, hold the hen’s wings behind his back. The hen will stay docile in this position.
- Give thanks to the hen for such a giving stay on the homestead…the eggs, the enjoyment of hearing them chatter throughout the day, and now for the meat and broth.
- Quickly, with a strong stroke, remove the head from the body just about mid-way along the neck. Continue to hold the wings together. The hen will tighten up momentarily Then keeping a grip on the wings with one hand and grabbing the legs together with the other, hold the hen over the ‘bleeding pot’ and let it bleed out. this does not take long.
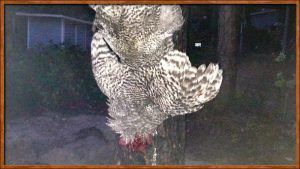
- Temporarily hang your hen on a line or nail on a tree to do a final bleed-out, while you prepare to harvest the next hen.
![]()
Scalding the hen…

- Holding the hen by the legs, dunk the bird into the scalding water and swish it around. Depending on the temp of your water, it will likely take 3-4 minutes for the bird to be ready. You’ll know it’s ready when you can grab a few feathers and they come out with minimal effort, it means you’re ready to pluck.
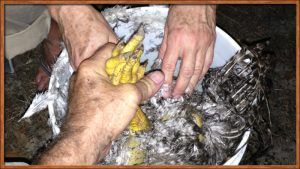
- Remove the hen from the water and either on a table or just sit in a chair, proceed to pluck all the feathers and place them in a bucket with the blood.
- There is an oil gland on the back end of the bird that will taint the taste of your meat if it ruptures, so you’ll want to remove it.
![]()
Gutting the Hen…
- Make a slice in the skin with your knife above the breastbone at the base of the neck.
- Tear down with your thumb to find the crop, windpipe, and esophagus. If you forgot to withhold feed from the birds, you’ll find a full crop. Be careful not to rupture it. (If you accidentally do, just rinse off the partially digested feed before continuing.) Bring the esophagus and windpipe out of the neck cavity, and break the connective tissue around the crop. However, do not pull this assembly out completely– leave it attached.
- With the bird still laying on its back, flip it 180 degrees so you can work on the back end. Cut right above the vent, and tear open the carcass with both hands. Put your hand into the carcass, pull the fat off the gizzard, and then hook your finger down and around the esophagus. Pull this out– you should have a handful of connected internal organs now. Cut down either side of the vent and underneath to remove all the guts, in one pull. Now go back in to remove the lungs and windpipe, or anything else that didn’t quite come out the first time.
- Make a slice in the excess skin that’s hanging off the back cavity, and then tuck the legs up through the hole so you have a nice little package.
![]()
Chill the Chicken…

- Once each bird is finished, place it in a cooler filled with ice. (Or if you have fridge space, you can chill them in there, wrapped in a plastic bag).
- Chill for a minimum of 8 – 10 hours if you are considering freezing them. If you are going to make broth, or eat them, let them cool for at least 4-6 hours in the fridge.
- After they have cooled sufficiently, wrap them and label them for the freezer!
![]()
Additional Photos
![]()

